
You want a Server Rent your own server
fully customized Layten Hosting
How to install Minecraft Forge
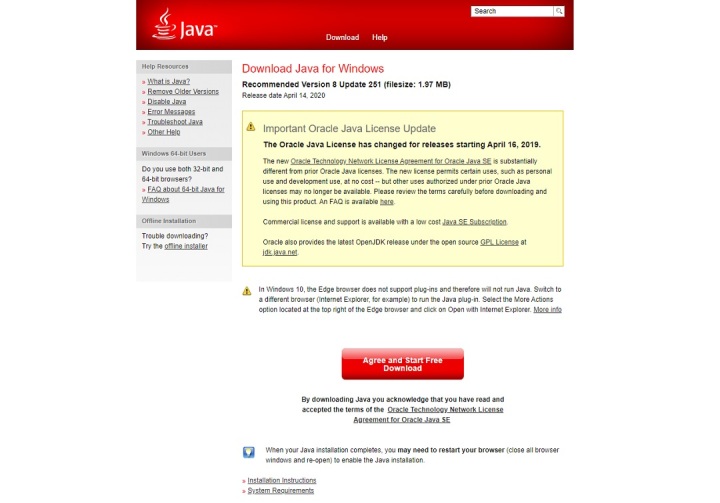
Install Java
The first thing you’ll want to do is ensure that Java is installed on your computer. If it’s not, head on over to the official Java website and click on the Java Download button. From there, you’ll be prompted to accept a few agreements, and the installation will begin. Then, just follow the straightforward directions to complete the download, and close out of your browser. There’s nothing else you’ll need to do with Java at this point — we’ll circle back to it later.
Run Minecraft
Once Java is installed, go ahead and run Minecraft. We recommend logging in to your account and actually jumping into a procedurally generated world to verify that the game does, in fact, run properly before messing with Forge. Running Minecraft will ensure that all the necessary folder locations have been created on your computer before attempting to install Forge. If you don’t run Minecraft prior to downloading Forge, you’ll encounter various errors when attempting to install mods later on.
Install Forge
You’ve installed Java, you’ve run Minecraft, and now it’s time to start with the setup of Forge. Navigate to its official website, and you’ll be greeted with several options for installation. Here’s what you’ll need to do:
Step 1: From the Recommended Download section, select the Installer option. If you are running any sort of firewall, you may have to bypass its security setting. Rest assured — your computer is safe!
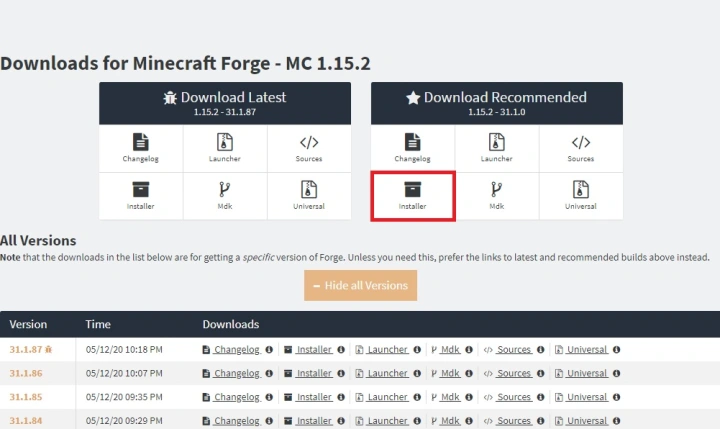
Step 2: Once the download is finished, you should have a new file on your computer with a filename similar to forge-1.15.2-31.1.0-installer.jar.
Step 3: Now that Java is installed on your computer, you should be able to click on the file and run it. This will open up the Mod System Installer, which will walk you through the process of setting up Forge on your system.
Step 4: Take note of the file path listed on the installer — you’ll need this later. Then, select Install Client and press OK.
Step 5: Once done, proceed through the prompts, and the Forge Installer should close.
That’s it for installing Forge! However, you’ll want to check to make sure it installed properly — and you still need to add all your mods to it.
Run Minecraft a second time
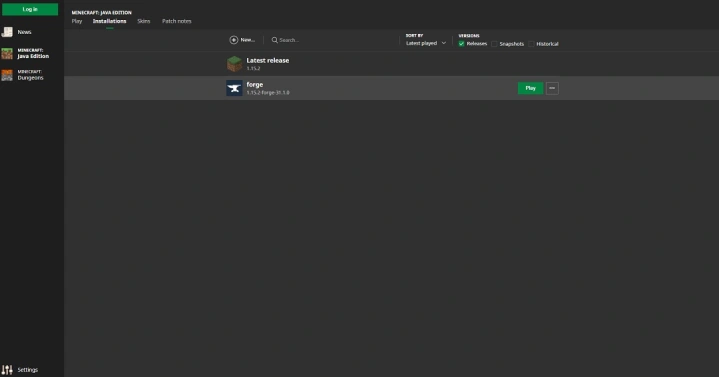
First, check Minecraft to make sure Forge is running. This is a simple process:
Step 1: Open Minecraft.
Step 2: Navigate to the Installations tab.
Step 3: Along with Latest Release, there should also be an option called Forge.
Step 4: To play Minecraft with your mods, you’ll want to hover over the Forge option and click Play.
Step 5: Then, log in with your regular credentials
If you’re able to log in with the Forge installation, that means you’re ready to join the wild world of modded Minecraft. If you don’t see the Forge option under Installations, try running the Forge installation again. Remember, you’ll want to select Install Client, not Install Server, and make sure you’re downloading the recommended version of Forge.
Install mods
Once Forge is properly set up, adding mods is a straightforward process. There are numerous websites that offer mods, but not all of them are compatible with Forge — or possibly even your specific version of Minecraft. We highly recommend using Curse Forge, as it is a reputable source that is safe, secure, and — most likely — compatible with all your software. Here’s how to install mods with Forge:
Step 1: Navigate to Curse Forge and browse through the mod listings until you find one that you like.

Step 2: Download the file associated with your current version of Minecraft. When in doubt, start with the most recent file — it’s likely that your game is automatically updated to the latest software.
Step 3: As with Forge, bypass any security features implemented by your firewall in order to complete the download process.
Step 4: You should now have a .jar filetype saved on your computer. This is your new mod!
Step 5: Take this file and move it into the Mods folder you took note of during the installation of Forge. This file path defaults to C: > Users > Username > AppData > Roaming > .minecraft.
Note: Some of the above folders are hidden on Windows 10. If you need help accessing hidden files, be sure to check out our in-depth tutorial.
Once you’ve placed the files into the Mods folder, the tricky part is over, and you can get back to ducking monsters and mining obsidian. Just make sure you’re playing under the Forge Installation — otherwise, your mods won’t load properly.

Enjoy your newly modded game
It can be an arduous and time-consuming process to get your mods up to speed and running correctly and effectively but don’t overcomplicate it. As a newbie Forge user, you can still accomplish quite a bit.
The whole process is exactly like the process for most operating systems, with the exception of Windows 10. However, keep in mind that there may still be a few minor differences in the directions related to the type of software you’re using. We highly recommend keeping detailed records, including file save locations, as this can vary significantly between operating systems.
Forge lets users easily disable and delete mods, making it a breeze if you suddenly change your mind and want to continue playing without their help. You’re also allowed to disable them for a brief period if necessary. To do this, all you have to do is type .disabled at the end of the file’s name. Once you do this, it will immediately turn off. If you want to enable it again, simply erase the .disabled, and it should automatically go back to normal.